…more artistic musings
A TRADITIONAL OLD WORLD oil glazed wall that has been damaged is nearly impossible to repair successfully. A New York training school recommends repainting entire wall and re-glazing the area. After years of applying an oil glaze to clients’ walls a procedure to repair the damaged glazed wall has been successfully developed.
PROJECT BACKGROUND
The original project was completed over 15 years ago. When new owners were moving in seven years ago the walls were damaged. CLASSICAL was called back to repair this damage. However, because the damage was extensive, not to mention that they had fallen in love with faux technique they decided to repaint and reproduce the original oil technique. The present day has produced another move (this time to replace a refrigerator) with more damage to the wall yet again. This time and not to repaint completely it was decided to repair the areas.
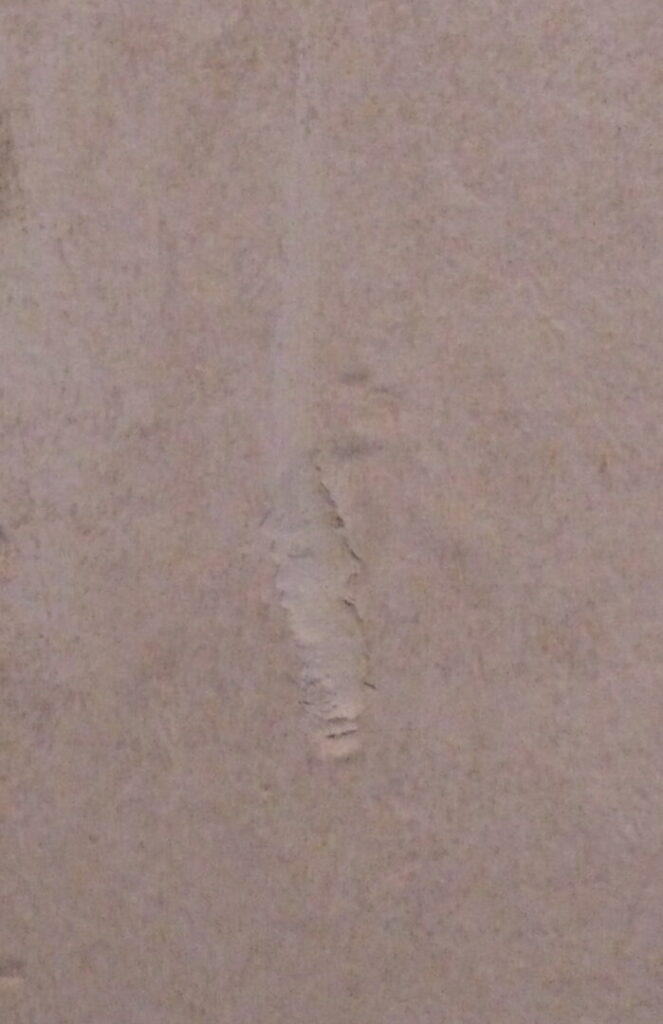
Damaged Area
As anyone who has worked with oil glazes knows it is almost impossible to repair an area that will match to the original. When I trained in New York we were taught to completely repaint.
Restoration to damaged oil glazed wall
Liquidtex Modeling Paste Matte was used instead of Spackling Paste to fill the damaged areas.
Modeling Paste is applied with a medium size palette knife that has a flat edge on one side. Once the Modeling Paste is loaded on the palette knife apply to damaged area holding the knife on a 45-degree angle, pulling down in the direction of the tear.
Let modeling paste set up 50%: repaired area that is filled with the Modeling Paste does not leave a finger print when touched, but the product is firm enough to be wiped off.
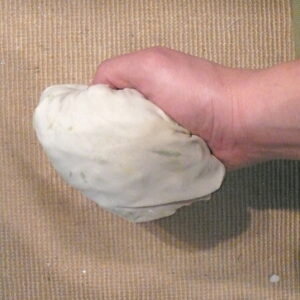
Use a damp cotton T-shirt that has been folded in a ball without creases. Hold the T-shirt as if you were gripping a baseball so that the flat smooth surface is parallel to the wall surface.
Rub off the extra Modeling Paste around the damaged area. Gently wipe the retouched area that has the Modeling Paste to a smooth finish. Be careful not to apply too much pressure; thus, removing too much of the filled in area. Allow repaired area to dry completely.
Repeat the above process several times bringing the repaired filled area level with the surrounding wall.
Again, wait for the paste to set up 50% and go ahead to remove the paste from the areas surrounding the repair. Re-wet the cotton t-shirt and hold in the way described above. Rub off the pasted from the damaged area until smooth and flush with the surface of the wall.
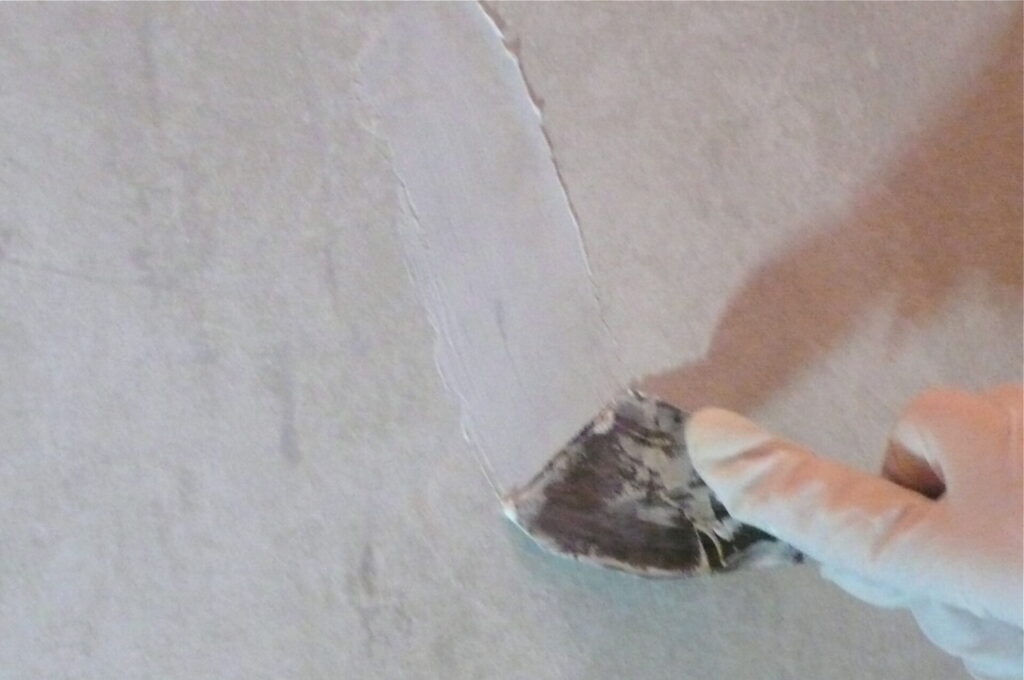
Wait for all steps to dry completely before painting the area with the appropriate base coat color.


Appropriate base coat color:
Pick an area from the wall that does not have the applied glaze and carefully match to this color. This will be your BASE COAT COLOR. When the repaired area has completely dried use a soft brush to feather in the base coat color to the repaired area. Dry completely. The last step is to apply the oil glaze that was used for original treatment. Again, using a soft brush to apply the glaze and appropriate tool for the glaze removal, carefully matching and blending to the original movement of the treatment.
Cynthia
